This tutorial describes how to prepare developing environment and deploy the AWARE iOS client.
AWARE iOS client is developed as a native iOS application by using Objective-C. The app can collect almost the same sensor data as the AWARE Android client (A table in the “Supported Sensor” section shows the supported sensor list on iOS client compare with Android.) You can develop and deploy the app to participants’ phone by using Xcode.app on the Mac OS X directly. Also, we have not released the app to App Store yet; so you can not download it on-the-fly without your Mac. However, if you have an iOS developer account, you can deploy it as an AdHoc application using DeployGate which can release the app like App Store.
First of all, we describe a quick instruction for deploying the AWARE iOS client to your iOS device (iOS 8 or later) from your Xcode (on your Mac) step-by-step. Second, we’ll show you a supported sensors list on AWARE iOS client, which compares with iOS and Android platforms.
In this tutorial, we recommend you to prepare following the devices and software:
- [Required] iOS device(iOS 8 or later)
- [Required] Mac
- [Required] Xcode.app
- [Required] CocoaPods
- [Optional] iOS Developer Account
- [Optional] DeployGate Account
Quick Install
This section shows you an instruction for quickly installing AWARE iOS client to your iOS device using Xcode.app. You can install the app by the following six steps.
- Download AWARE client iOS from GitHub and unzip the file.
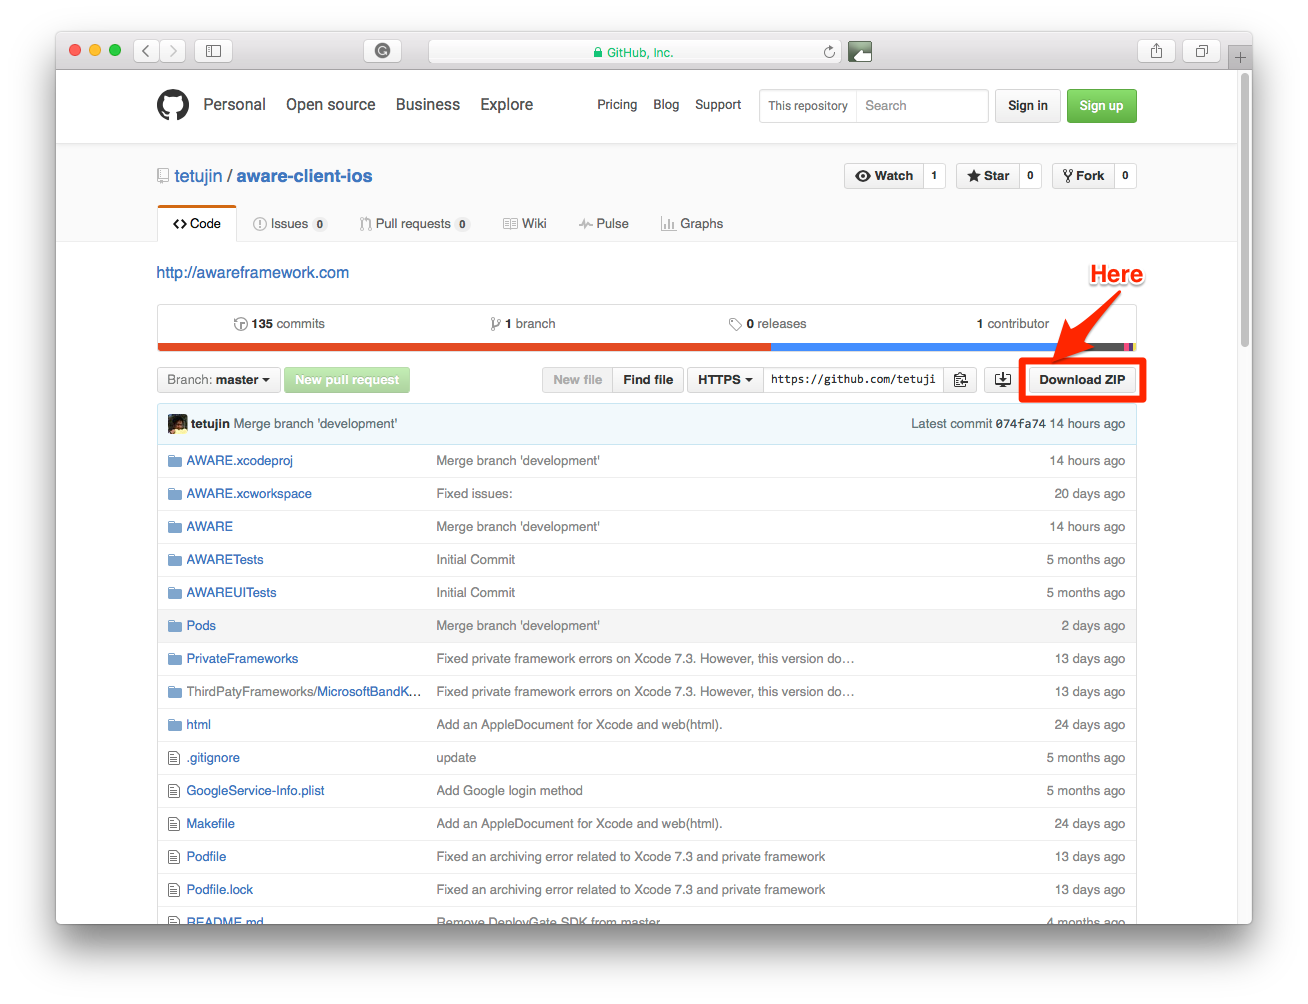
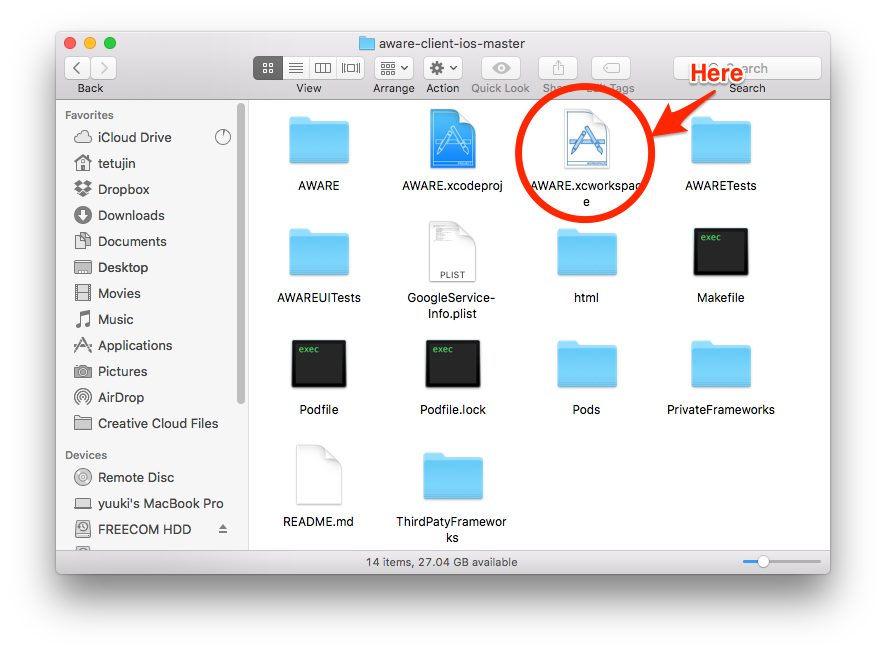
- Open the AWARE.xcworkspace in the file with Xcode.app.
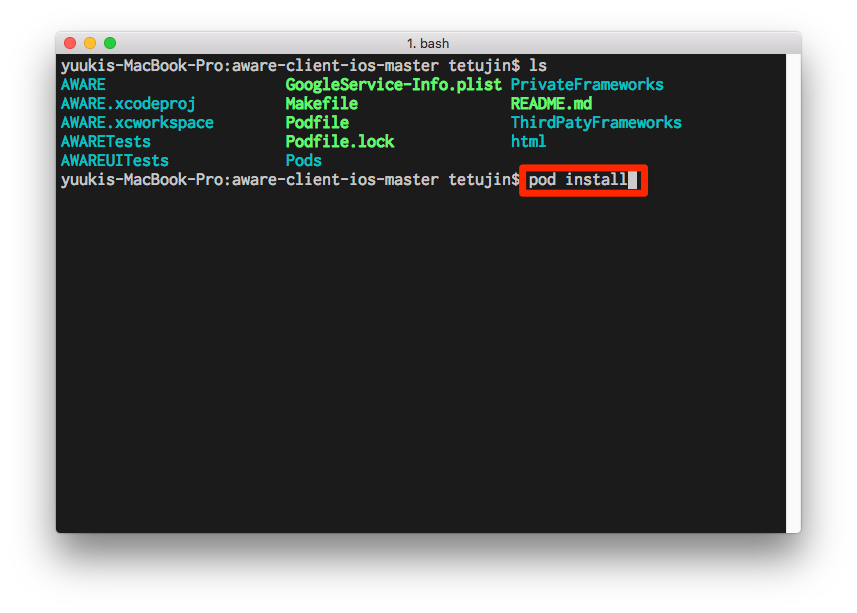
- The project is using CocoaPods as a library manager. Please update required libraries with the pod command as follows.
- Move to the project directory, and run ‘pod install’ command on your terminal. All required libraries will be installed after the command.
- You can access more detail information from CocoaPods’s official website.
- Connect your iOS device (iPhone, iPad, or iPod) to your Mac.
- Set the project setting on Xcode (“AWARE” on the sidebar -> “General” on the tab bar -> “AWARE” in the list of TARGETS tab -> “Identity”)
- Check if your iOS device is connected
- Edit your original “Bundle Identifier”
- Set your iOS developer account if you have it
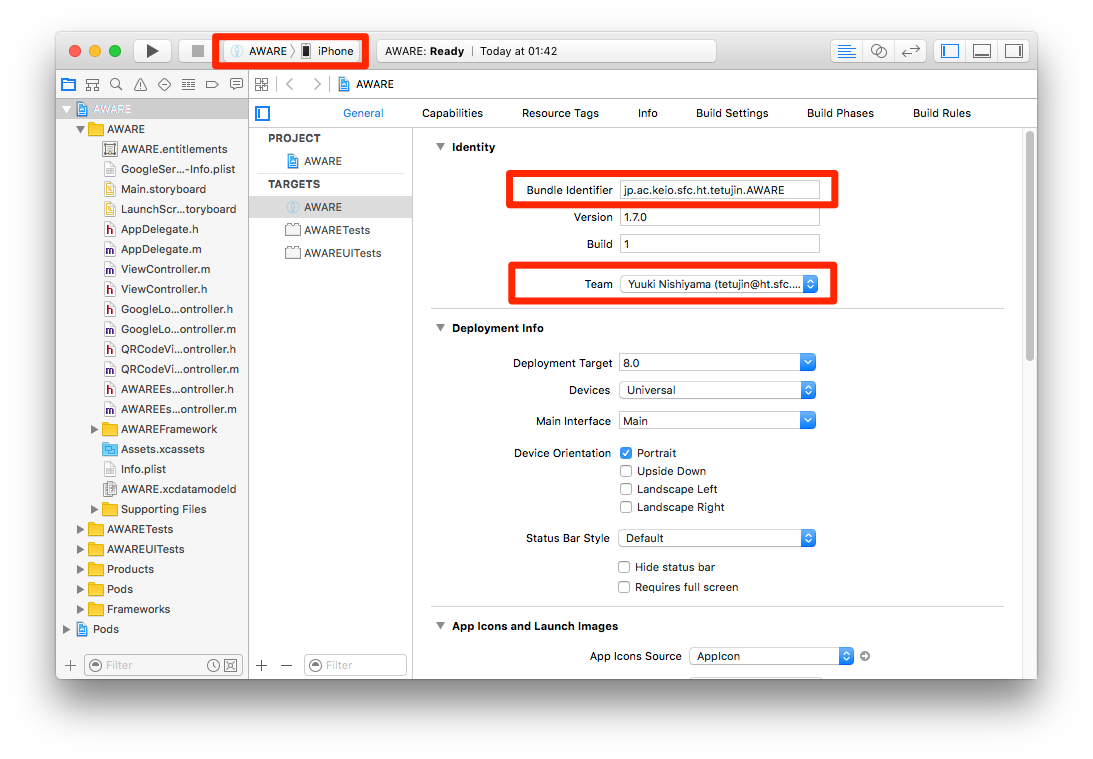
- Push “Run” button on the Xcode for installing AWARE client iOS to your device.
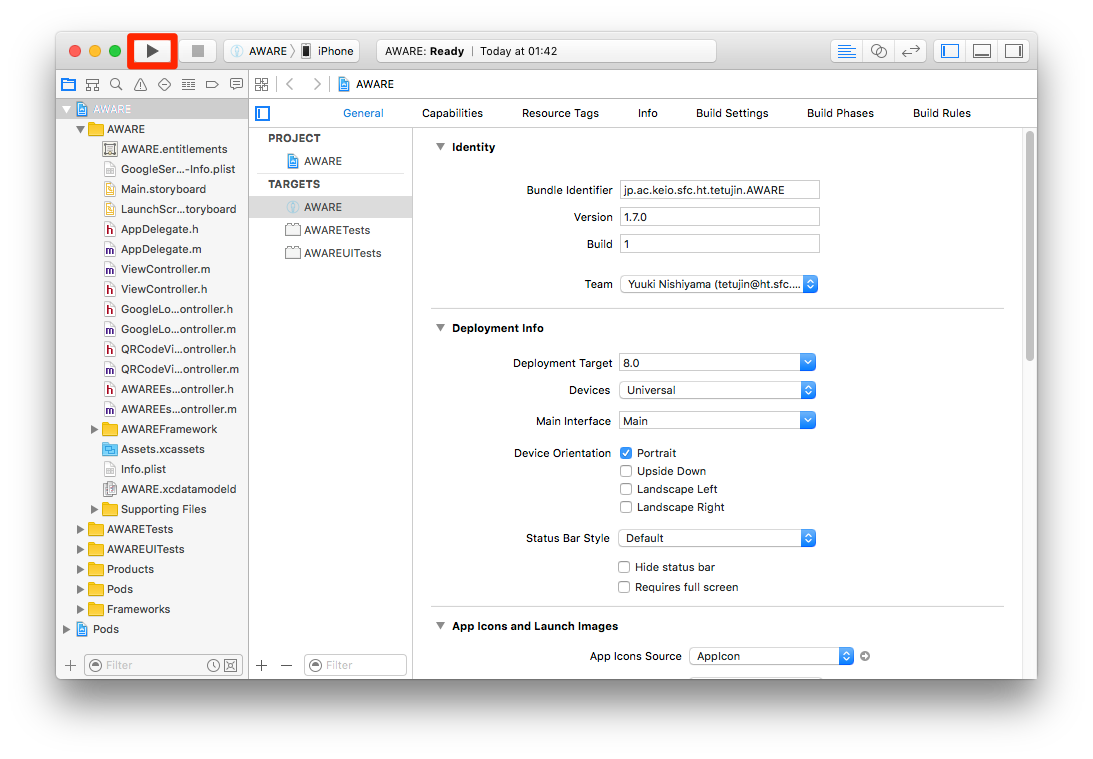
- That’s it!
Join a Study
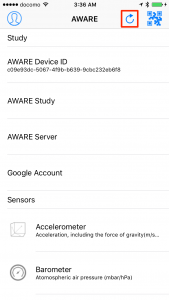
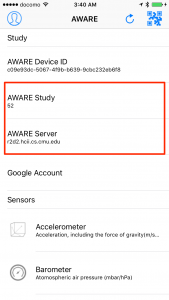
AWARE iOS client can join a study by using QR code on the AWARE dashboard with three steps.
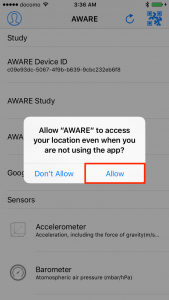
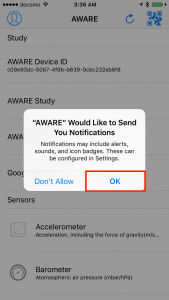
- Open the AWARE iOS client, and allow “location” and “notification” events

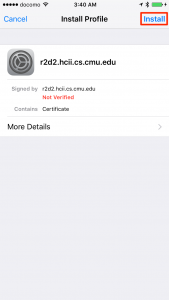
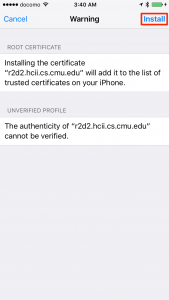
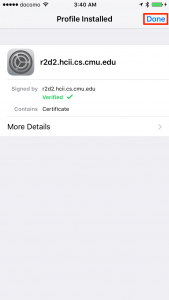
- Read a study QR code, and install a profile for SSL communication
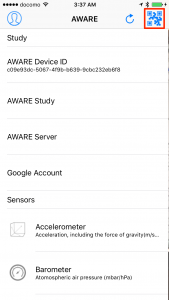
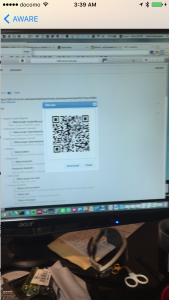
- Initialize sensors with a refresh button
Supported Sensors
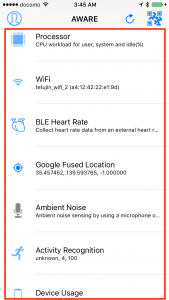
Currently, AWARE iOS client support 24 sensors. The bellow table shows the list of supported sensors. “○” means the supported, on the other side, “×” is not supported. Also, “△” means that is not supported yet, but it is possible to support on iOS in the future.
The collected sensor data are stored to local storage on the phone. When the phone starts to charge a battery and connecting Wi-Fi, AWARE iOS client will upload the stored data to the server.
|
Sensor Name
|
Android
|
iOS |
Note
|
||
| 9.x | 8.x | 7.x | |||
| Accelerometer | ○ | ○ | ○ | ○ | |
| Ambient Noise | ○ | × | × | × | |
| (Android Wear) Apple Watch |
○ | △ | △ | × | |
| Applications | ○ | × | × | × | |
| Barometer | ○ | ○* | ○* | × | *iPhone 6 or later devices are supported |
| Battery | ○ | ○ | ○ | ○ | |
| Bluetooth | ○ | ○ | ○ | ○ | |
| Communication | ○ | △ | △ | △ | only “phone call” event |
| Device Usage | ○ | ○ | ○ | ○ | |
| ESM | ○ | ○ | ○ | ○ | |
| (Google) Activity Recognition | ○ | ○ | ○ | ○** | **iPhone 5s(M7 chip) or later devices are supported |
| (Google) Fused Location | ○ | ○ | ○ | ○ | iOS location API (CoreLocation) |
| Google Login | ○ | ○ | ○ | ○ | |
| Gravity | ○ | ○ | ○ | ○ | |
| Gyroscope | ○ | ○ | ○ | ○ | |
| Installations | ○ | × | × | × | |
| Keyboard | ○ | × | × | × | |
| Light | ○ | × | × | × | |
| Linear Accelerometer | ○ | ○ | ○ | ○ | |
| Locations | ○ | ○ | ○ | ○ | |
| Lux Meter | ○ | × | × | × | |
| Magnetometer | ○ | ○ | ○ | ○ | |
| Netwrok | ○ | ○ | ○ | — | |
| NTPTime | ○ | ○ | ○ | ○ | |
| OpenWeather | ○ | ○ | ○ | — | |
| Processor | ○ | ○ | ○ | ○ | |
| Proximity | ○ | × | × | × | |
| Rotation | ○ | ○ | ○ | ○ | |
| Scheduler | ○ | ○ | ○ | ○ | |
| Screen | ○ | ○ | ○ | ○ | |
| Telephony | ○ | × | × | × | |
| Temperature | ○ | × | × | × | |
| Timezone | ○ | ○ | ○ | ○ | |
| Wi-Fi | ○ | ○ | ○ | ○ | |